
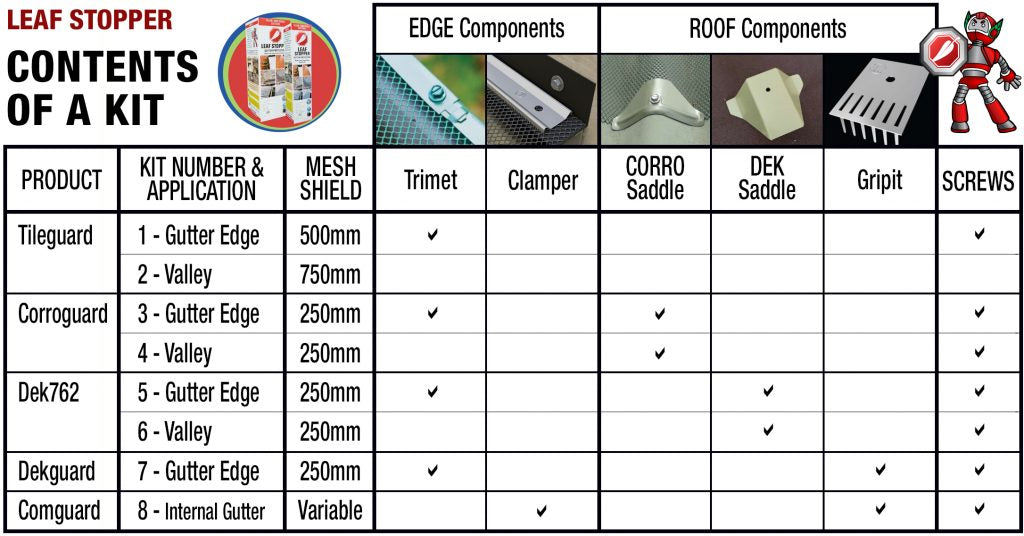
Corroguard Installation Instruction
Leaf Stopper follows an easy 3-step install to fit securely to your corrugated roof:
-
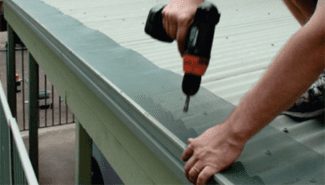
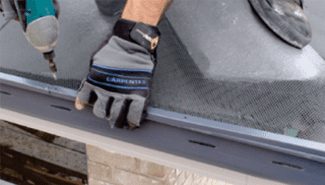
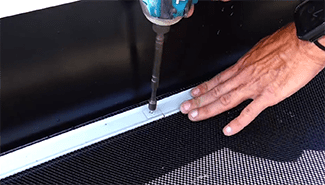
SECURE THE MESH
Roll out the mesh shield along your gutter. Secure it to the gutter edge using the provided screws and interlocking trimets. -
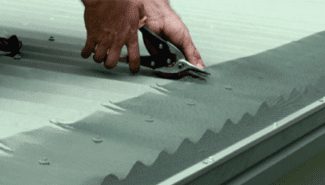
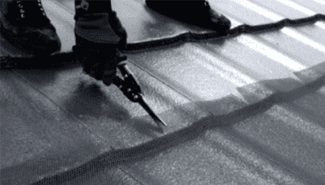
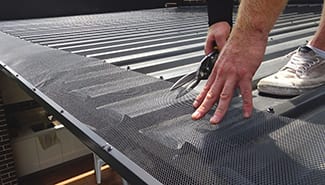
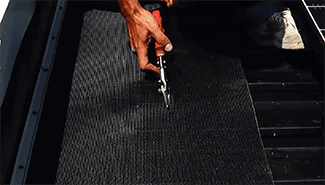
CUT THE MESH
Make cuts in the Leaf Stopper mesh shield with snippers to allow it to mould around the shape of your roof. -
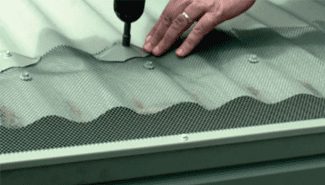
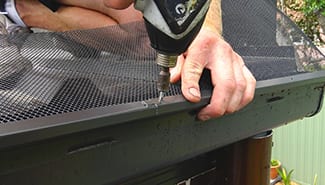
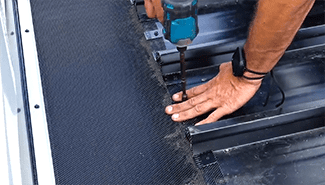
FASTEN THE MESH
Take the provided saddle clips and place them over the mesh shield. Screw them in place with the provided screws.


TILEGUARD Installation Instruction
Leaf Stopper follows an easy 3-step install to fit securely to your tiled roof:
-
SECURE THE MESH TO GUTTER
Roll out the mesh shield along your gutter. Secure it to the gutter edge using the provided screws and interlocking Trimets. -
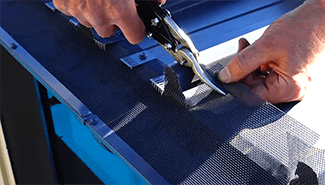
MAKE EXPANSION CUTS
Make expansion cuts in the Mesh Shield with cutting snips to allow it to mould to the shape of your roof tiles. -
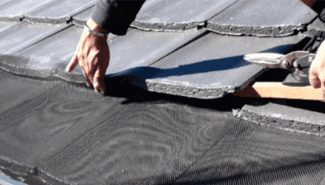
Tuck the mesh
Take the Mesh Shield and tuck it under the second row of tiles on your roof and you’re done!


DEK762 Installation Instruction
Leaf Stopper DEKGUARD 762 follows an easy 3-step install to fit securely to your deck roof:
-
SECURE THE MESH TO GUTTER
Roll out the Mesh Shield along your gutter. Secure it to the gutter edge using the provided screws and interlocking Trimets. -
MAKE EXPANSION CUTS
Make expansion cuts along the Mesh Shield with cutting snips to allow it to mould around the shape of your roof. -
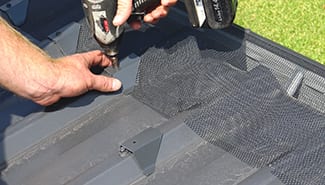
FASTEN THE MESH TO THE ROOF
Take the provided saddle clips and place them over the Mesh Shield. Screw them in place with the provided screws.


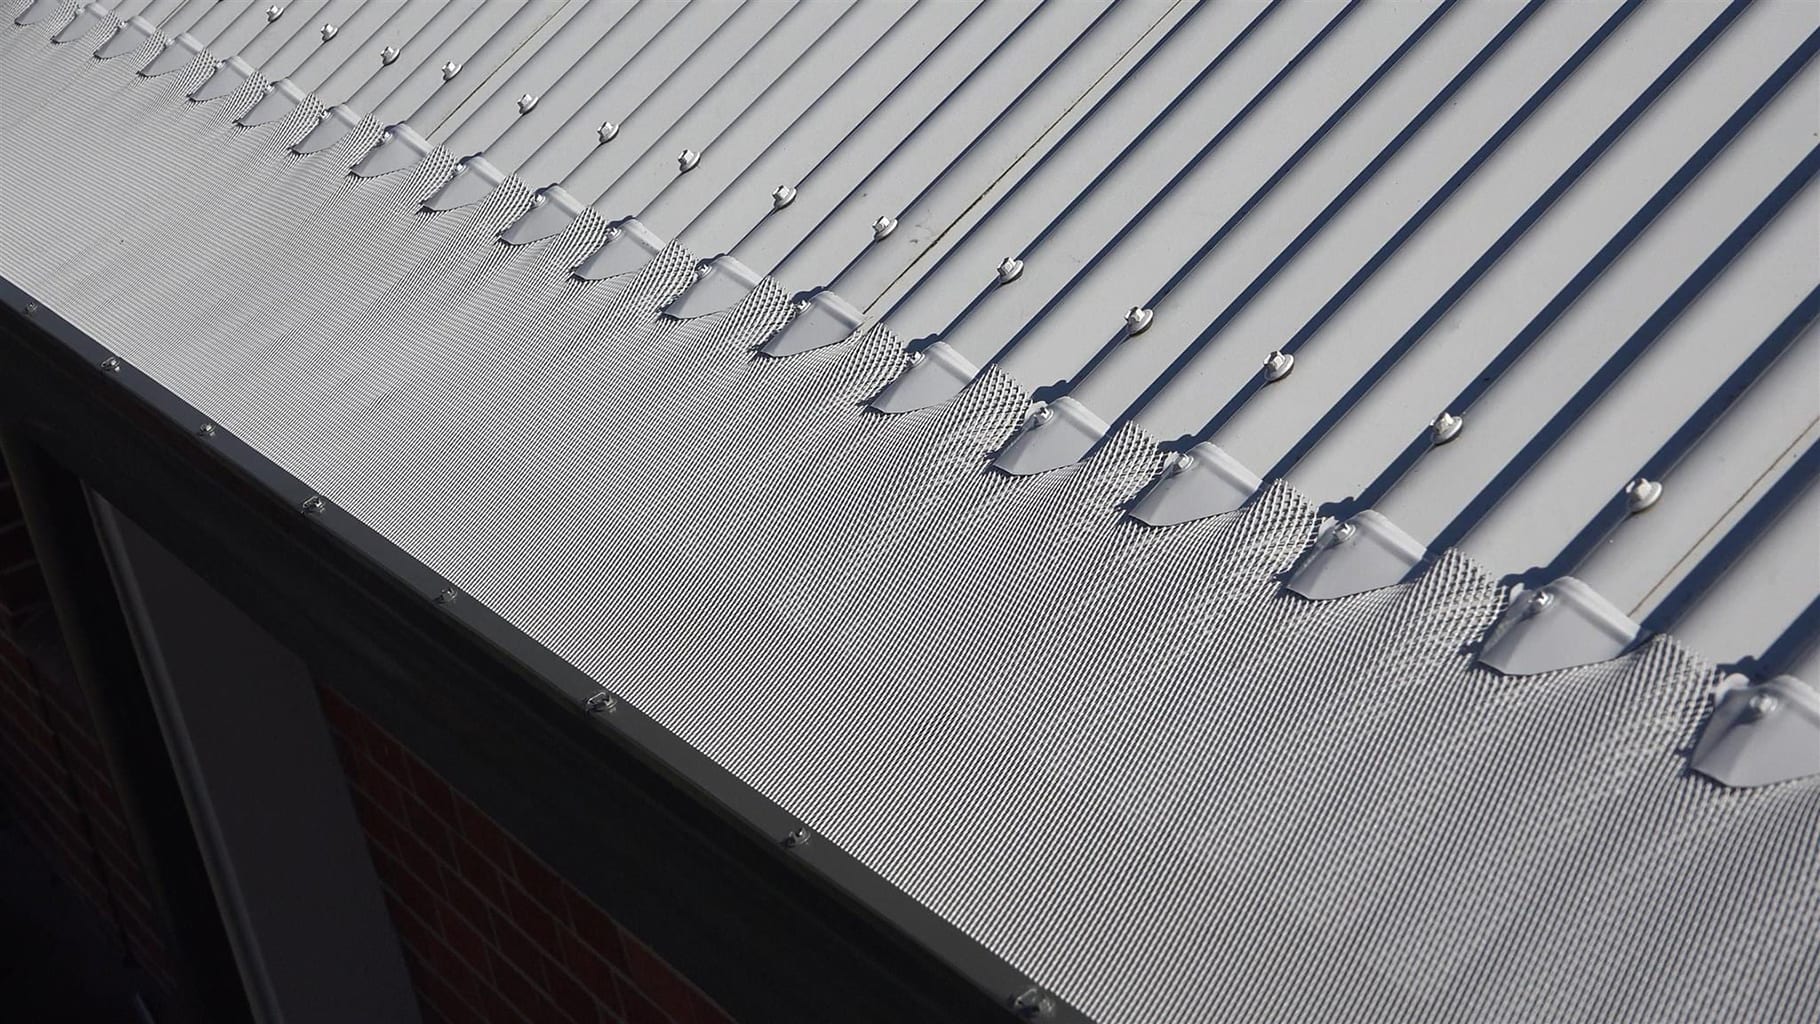
DEKGUARD™ Installation Instruction
Installing typical gutter guards on flat-based roofs such as Kliplok, Speed Deck, Metlok, Topdek, Spandek etc has been difficult because most saddle clips do not effectively fit these roof profiles.
To solve this problem, our team came up with revolutionary ‘GRIPIT’ bracket with claws – a powerful new way to secure the Mesh Shield to flat-based roofs without using saddles.
-

SECURE THE MESH
Roll out the Mesh Shield along your gutter. Secure it to the gutter edge using the provided screws and interlocking Trimets. -
CUT THE MESH
Make cuts to allow the Mesh Shield to cover roof flat pans, while using mesh flaps to cover roof ribs. -
FASTEN THE MESH
Once the cuts have been made, secure the Mesh Shield to cover roof section using GRIPIT claws.


COMGUARD™ Installation Instruction
Leaf Stopper COMGUARD provides a Mesh Shield that covers your gutters and roof valleys to keep out leaves and debris, so water can be efficiently channelled away from your home.
Leaf Stopper is designed to attach the Mesh Shield to one side of a box gutter using patented CLAMPER strips and the other side with patented GRIPIT brackets, leaving no gaps for leaves. COMGUARD provides a strong grip over a longer span and was developed for commercial and industrial purposes, but it is also suitable for residential application.
-
SECURE THE MESH
Roll out the mesh shield along your gutter. Secure it to the gutter edge using the provided screws and interlocking trimets. -
CUT THE MESH
Make cuts in the Leaf Stopper mesh shield with snippers to allow it to mould around the shape of your roof. -
FASTEN THE MESH
Take the provided saddle clips and place them over the mesh shield. Screw them in place with the provided screws.


